Address Resolution Protocol (ARP) is a stateless protocol used for
resolving IP addresses to machine MAC addresses. All network devices
that need to communicate on the network broadcast ARP queries in the
system to find out other machines’ MAC addresses. ARP Poisoning is also
known as ARP Spoofing.
Here is how ARP works −
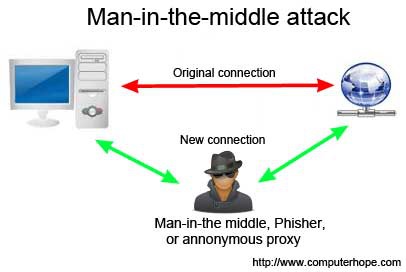 A third person exists to control and monitor the traffic of communication between two parties. Some protocols such as SSL serve to prevent this type of attack.
For this exercise, you would need the following tools −
Step 1 − Install the VMware workstation and install the Kali Linux operating system.
Step 2 − Login into the Kali Linux using username pass “root, toor”.
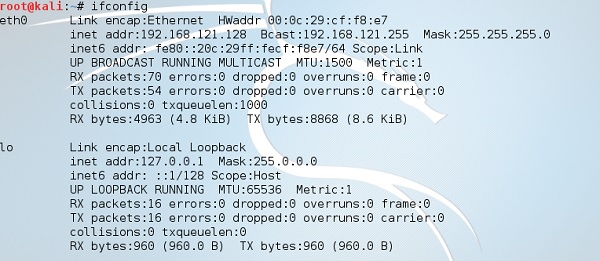
Step 3 − Make sure you are connected to local LAN and check the IP address by typing the command ifconfig in the terminal.
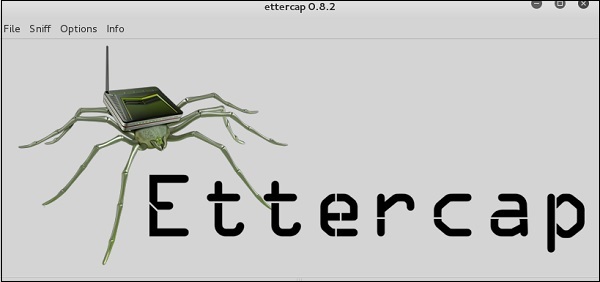
 Step 4 − Open up the terminal and type “Ettercap –G” to start the graphical version of Ettercap.
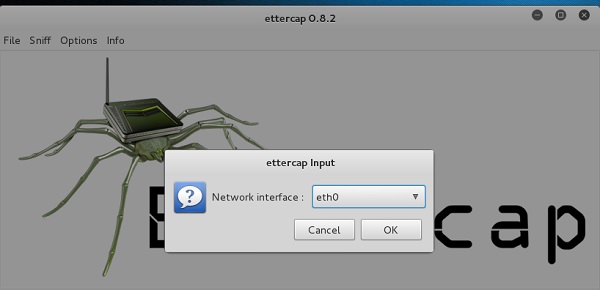
 Step 5 − Now click the tab “sniff” in the menu bar and select
“unified sniffing” and click OK to select the interface. We are going to
use “eth0” which means Ethernet connection.
 Step 6 − Now click the “hosts” tab in the menu bar and click
“scan for hosts”. It will start scanning the whole network for the alive
hosts.
Step 7 − Next, click the “hosts” tab and select “hosts list” to see the number of hosts available in the network. This list also includes the default gateway address. We have to be careful when we select the targets.
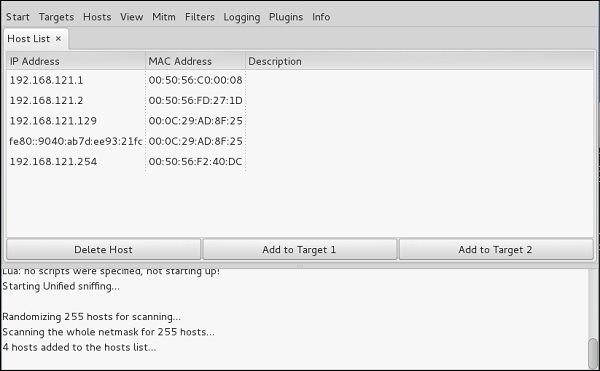 Step 8 − Now we have to choose the targets. In MITM, our
target is the host machine, and the route will be the router address to
forward the traffic. In an MITM attack, the attacker intercepts the
network and sniffs the packets. So, we will add the victim as “target 1”
and the router address as “target 2.”
In VMware environment, the default gateway will always end with “2” because “1” is assigned to the physical machine.
Step 9 − In this scenario, our target is “192.168.121.129” and the router is “192.168.121.2”. So we will add target 1 as victim IP and target 2 as router IP.
 Step 10 − Now click on “MITM” and click “ARP poisoning”. Thereafter, check the option “Sniff remote connections” and click OK.
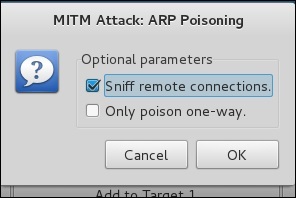 Step 11 − Click “start” and select “start sniffing”. This will
start ARP poisoning in the network which means we have enabled our
network card in “promiscuous mode” and now the local traffic can be
sniffed.
Note − We have allowed only HTTP sniffing with Ettercap, so don’t expect HTTPS packets to be sniffed with this process.
Step 12 − Now it’s time to see the results; if our victim logged into some websites. You can see the results in the toolbar of Ettercap.
 This is how sniffing works. You must have understood how easy it is to get the HTTP credentials just by enabling ARP poisoning.
ARP Poisoning has the potential to cause huge losses in company environments. This is the place where ethical hackers are appointed to secure the networks.
Like ARP poisoning, there are other attacks such as MAC flooding, MAC spoofing, DNS poisoning, ICMP poisoning, etc. that can cause significant loss to a network.
In the next chapter, we will discuss another type of attack known as DNS poisoning.
Here is how ARP works −
- When one machine needs to communicate with another, it looks up its ARP table.
- If the MAC address is not found in the table, the ARP_request is broadcasted over the network.
- All machines on the network will compare this IP address to MAC address.
- If one of the machines in the network identifies this address, then it will respond to the ARP_request with its IP and MAC address.
- The requesting computer will store the address pair in its ARP table and communication will take place.
What is ARP Spoofing?
ARP packets can be forged to send data to the attacker’s machine.- ARP spoofing constructs a large number of forged ARP request and reply packets to overload the switch.
- The switch is set in forwarding mode and after the ARP table is flooded with spoofed ARP responses, the attackers can sniff all network packets.
What is MITM?
The Man-in-the-Middle attack (abbreviated MITM, MitM, MIM, MiM, MITMA) implies an active attack where the adversary impersonates the user by creating a connection between the victims and sends messages between them. In this case, the victims think that they are communicating with each other, but in reality, the malicious actor controls the communication. A third person exists to control and monitor the traffic of communication between two parties. Some protocols such as SSL serve to prevent this type of attack.
ARP Poisoning − Exercise
In this exercise, we have used BetterCAP to perform ARP poisoning in LAN environment using VMware workstation in which we have installed Kali Linux and Ettercap tool to sniff the local traffic in LAN.For this exercise, you would need the following tools −
- VMware workstation
- Kali Linux or Linux Operating system
- Ettercap Tool
- LAN connection
Step 1 − Install the VMware workstation and install the Kali Linux operating system.
Step 2 − Login into the Kali Linux using username pass “root, toor”.
Step 3 − Make sure you are connected to local LAN and check the IP address by typing the command ifconfig in the terminal.
 Step 4 − Open up the terminal and type “Ettercap –G” to start the graphical version of Ettercap.
 Step 5 − Now click the tab “sniff” in the menu bar and select
“unified sniffing” and click OK to select the interface. We are going to
use “eth0” which means Ethernet connection.
 Step 6 − Now click the “hosts” tab in the menu bar and click
“scan for hosts”. It will start scanning the whole network for the alive
hosts.
Step 6 − Now click the “hosts” tab in the menu bar and click
“scan for hosts”. It will start scanning the whole network for the alive
hosts.Step 7 − Next, click the “hosts” tab and select “hosts list” to see the number of hosts available in the network. This list also includes the default gateway address. We have to be careful when we select the targets.
 Step 8 − Now we have to choose the targets. In MITM, our
target is the host machine, and the route will be the router address to
forward the traffic. In an MITM attack, the attacker intercepts the
network and sniffs the packets. So, we will add the victim as “target 1”
and the router address as “target 2.”
Step 8 − Now we have to choose the targets. In MITM, our
target is the host machine, and the route will be the router address to
forward the traffic. In an MITM attack, the attacker intercepts the
network and sniffs the packets. So, we will add the victim as “target 1”
and the router address as “target 2.”In VMware environment, the default gateway will always end with “2” because “1” is assigned to the physical machine.
Step 9 − In this scenario, our target is “192.168.121.129” and the router is “192.168.121.2”. So we will add target 1 as victim IP and target 2 as router IP.
 Step 10 − Now click on “MITM” and click “ARP poisoning”. Thereafter, check the option “Sniff remote connections” and click OK.
 Step 11 − Click “start” and select “start sniffing”. This will
start ARP poisoning in the network which means we have enabled our
network card in “promiscuous mode” and now the local traffic can be
sniffed.
Step 11 − Click “start” and select “start sniffing”. This will
start ARP poisoning in the network which means we have enabled our
network card in “promiscuous mode” and now the local traffic can be
sniffed.Note − We have allowed only HTTP sniffing with Ettercap, so don’t expect HTTPS packets to be sniffed with this process.
Step 12 − Now it’s time to see the results; if our victim logged into some websites. You can see the results in the toolbar of Ettercap.
 This is how sniffing works. You must have understood how easy it is to get the HTTP credentials just by enabling ARP poisoning.
ARP Poisoning has the potential to cause huge losses in company environments. This is the place where ethical hackers are appointed to secure the networks.
Like ARP poisoning, there are other attacks such as MAC flooding, MAC spoofing, DNS poisoning, ICMP poisoning, etc. that can cause significant loss to a network.
In the next chapter, we will discuss another type of attack known as DNS poisoning.
Comments
Post a Comment